Purpose
Keeps the selected identifier fields and converts every other column into a separate row. The column name becomes the period-field value, and the cell contents become the measure value. Useful for tables with months or measures arranged across columns.
Inputs and outputs
One table input, in; out contains id_columns and two new columns.
Parameters
| Parameter | Settings and values | Options and limits |
|---|---|---|
id_columns | Fields repeated in every created row; from 1 to 100. All other fields are unpivoted. | Count: 1–100 |
period_column | The field name for the original column names; Period by default. | Default: PeriodUp to 100 characters |
unpivot_value_column | The field name for cell values; Value by default. | Default: ValueUp to 100 characters |
Step-by-step configuration
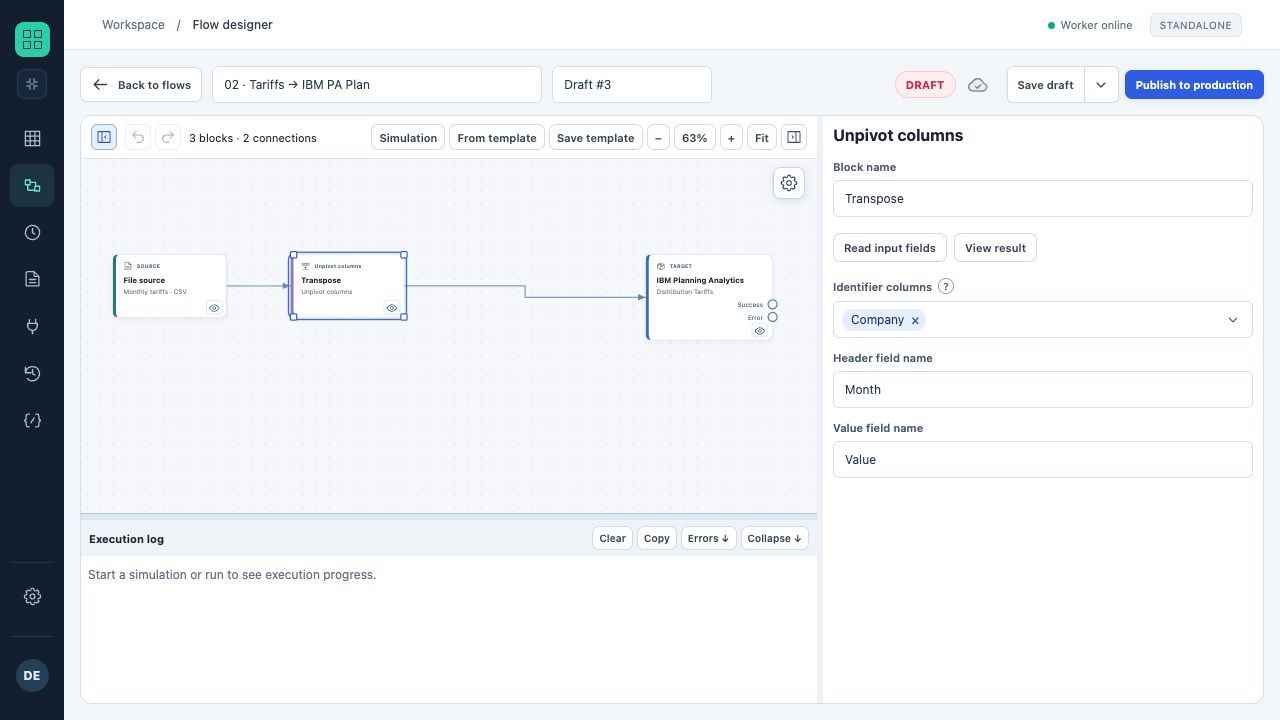
Company remains the row identifier, month headings become Month values, and the values go into Value.
- Connect the wide table and read its fields.
- Select all identifier fields, such as product, department and scenario.
- Name the new fields, for example Month and Value.
- Check the sample: every original month should become a separate row.
Rules and diagnostics
- The identifier names and the two new field names must differ.
- Do not leave an auxiliary text column among the periods: it will also be unpivoted.
- The number of rows increases; monitor the overall cell limit.
- After unpivoting, you can separately filter out empty measures and normalise numbers.
Configuration example
Input: Product=A, Jan=10, Feb=15. id_columns=[Product], period_column=Month, unpivot_value_column=Value. Output: A, Jan, 10 and A, Feb, 15.