1. Prepare the Mac
The Agent supports macOS 10.13 High Sierra and later on Intel and Apple Silicon. Its runtime is included in the package. Installation and configuration require a Mac administrator; a separate service account handles ongoing operation.
Choose a computer that can reach the required databases, APIs and file resources. Allow outbound TCP 443 to Data Bridge, check the system clock and configure power settings so the Mac stays awake while flows run. Allow approximately 180 MB for two program versions, plus log storage: up to 120 MB with default settings.
2. Verify the package
Obtain the .pkg package and its expected SHA-256 checksum from your Data Bridge administrator. Verify the file in Terminal, replacing the example with its actual path:
shasum -a 256 "/path/to/installer.pkg"The checksum must match exactly. The initial package is not signed with Apple Developer ID. After verifying its origin, integrity and administrator approval, open that specific file. On macOS 10.13–14, Control-click and select Open. On macOS 15 and later, after the first attempt, use System Settings → Privacy & Security → Open Anyway. Do not disable system protection. Do not install a package with an incorrect checksum.
3. Install the Agent
Complete the Introduction and Installation steps, select Install and enter the administrator password. The installer checks requirements and files, creates the _ubcagent account, installs the application and starts the service.
The main launchd service is app.ubcanalytics.databridge.agent; the updater is app.ubcanalytics.databridge.agent.updater. Open settings through /Applications/UBC Data Bridge Agent.app. Program files are under /Library/Application Support/UBC Data Bridge Agent/program/; settings and state are under /Library/Application Support/UBC Data Bridge Agent/data/.
For managed deployment, an administrator can use MDM or the following command with the actual verified package path. Open the settings application manually afterward and enter the registration key in its dedicated field.
sudo installer -pkg "/path/to/installer.pkg" -target /The configuration file is /Library/Application Support/UBC Data Bridge Agent/data/config.json. Edit parameters through the local settings window, which validates the values you enter.
4. Register and approve the computer
- Open Applications → UBC Data Bridge Agent and authorize administrator access.
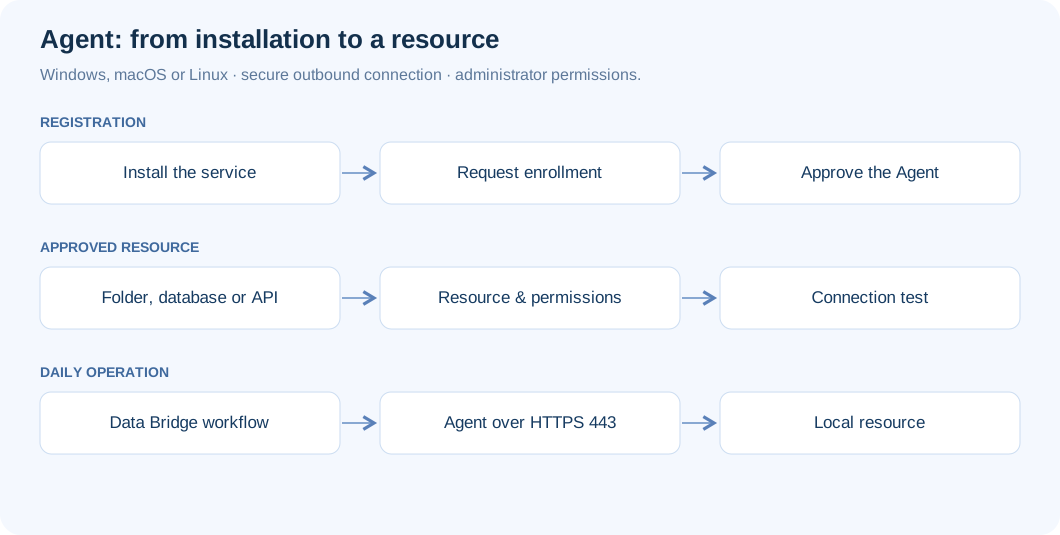
- Under Connection, paste the single-use key received through a secure channel and select Register. Do not store the key in Terminal commands or screenshots.
- Compare the confirmation code with the one under Settings → Access → Agents in Data Bridge. Select Codes match — approve only when they match exactly.
- Check for Connected status. If needed, configure the proxy and additional trusted root certificate under Connection.
The settings window is available only locally at 127.0.0.1, with a single-use secret in its address. Do not share this address with other users. If changing the Data Bridge address, use the approved HTTPS URL of your installation.
5. Grant file access
In Resources, create a folder resource and define the required rights. A dedicated directory under /Users/Shared/ is useful for file exchange. Select Grant service access to assign permissions to _ubcagent. Reading, creating, overwriting, renaming and deleting are controlled separately.
macOS applies additional privacy protection to user folders and some volumes. If access to such a resource is required, an administrator can grant Full Disk Access under Privacy & Security to this runtime component:
/Library/Application Support/UBC Data Bridge Agent/program/current/runtime/Python.framework/Versions/3.13/Resources/Python.appGrant this permission only when necessary; it does not replace the local resource policy. Volumes mounted in Finder belong to the user session and may be unavailable to the service. Use a system-level mount configured by an administrator, for example through autofs, or place the Agent on the file server.
6. Verify operation and inspect logs
Select Test connection beside the resource. In Data Bridge, choose Through Agent; for folders, use Local folder (through UBC Agent). Select Test and run a controlled flow. These commands inspect the local service and run diagnostics:
sudo launchctl print system/app.ubcanalytics.databridge.agent
sudo "/Library/Application Support/UBC Data Bridge Agent/program/agent" status
sudo "/Library/Application Support/UBC Data Bridge Agent/program/agent" diagnose
Logs are stored in /Library/Logs/UBC Data Bridge Agent/: install.log, agent.log, audit.log and service-output.log. If the Mac becomes unavailable during sleep, inspect its power settings as well as the network.
7. Update, move and uninstall
The Version and updates tab offers automatic, manual and disabled modes. Updates are verified against the publisher’s signature and SHA-256. A new version is installed alongside the current one; the previous version is restored if it cannot start or connect. Reinstalling preserves settings.
To move the Agent, register the new computer using a new key from Data Bridge. To uninstall, run:
sudo bash "/Library/Application Support/UBC Data Bridge Agent/program/uninstall.command"The uninstaller separately asks whether to remove state, the key, logs and the service account. Revoke access in Data Bridge as well. Continue with resource configuration and troubleshooting.