What the Agent does
UBC Data Bridge Agent is a service that connects UBC Data Bridge 2.1.1 to resources in your private network. It runs on a Windows, macOS or Linux computer that can reach the required folders, databases and APIs. A Data Bridge flow can then read a local Excel file, connect to an internal database server or call a corporate API through an explicitly permitted route.
The Agent performs defined connection and data exchange operations. It does not provide an unrestricted remote command prompt. Access depends on three separate layers: the locally allowed resources, the service account’s operating system permissions and the credentials accepted by the target system.
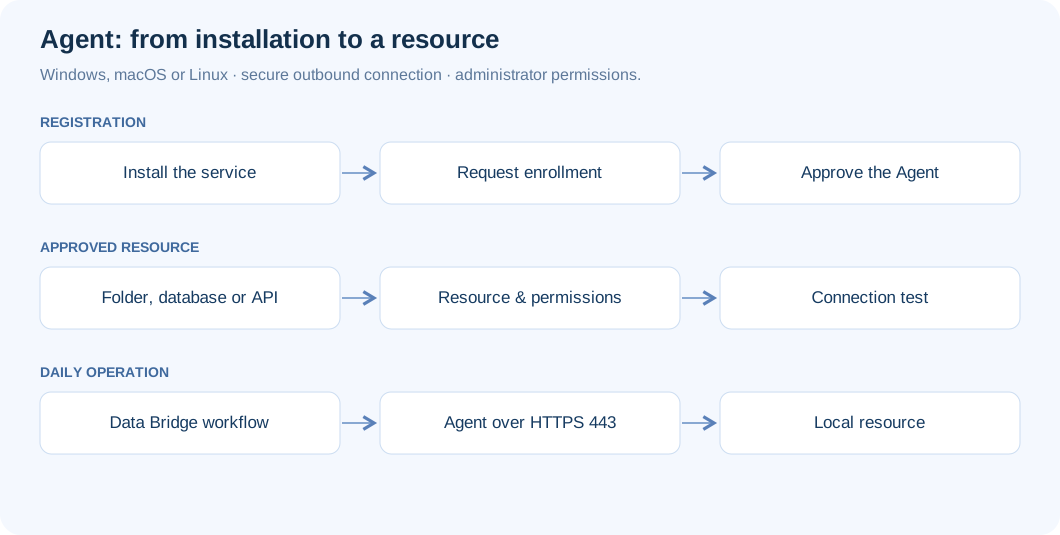
How the connection works
The Agent initiates an outbound TCP 443 connection to your Data Bridge installation through UBC Secure Access Gateway. This route does not require inbound ports or an internet-facing local database. A secure WebSocket is the preferred transport; automatic mode falls back to long HTTPS requests when the network does not allow WebSockets.
HTTPS protects the outer transport, while an inner TLS 1.3 channel uses mutual certificate authentication. The private key is generated on the Agent computer and remains there. Corporate environments can configure a proxy and an additional trusted root certificate. Network rules must also allow the Agent computer to reach the internal resources it needs.
Prepare the computer and permissions
- Choose a computer that stays on, keeps accurate time and can reach the required resources. Assign an administrator and plan maintenance windows.
- Confirm the Data Bridge installation’s HTTPS address, outbound TCP 443 rules, corporate proxy settings and any additional certificate authority requirements.
- List the minimum resources required: exact database hosts and ports, API base URLs, folders and permitted file operations.
- Obtain the installer for your operating system and its SHA-256 checksum from your Data Bridge administrator. Verify its origin and integrity before installation.
- Follow the Windows or macOS or Linux installation guide. Installing and configuring the local service requires administrator privileges on that computer.
Create and approve the Agent
In Data Bridge, open Settings → Access → Agents, create an Agent and set its access period. Generate a single-use registration key. Share it with the computer administrator through an approved secure channel. Do not include it in widely accessible messages, screenshots or command examples.
In the local settings window, open Connection, paste the key into its dedicated field and select Register. The key identifies the appropriate environment; there is no tenant identifier to enter manually. Each key registers one computer.
If approval is enabled, compare the code in the local window with the code in Data Bridge: Approve… → Codes match — approve. If they differ, revoke access and investigate where the key was used. An Agent awaiting approval may establish its channel, but it cannot perform resource operations.
Registration key expiry and Agent access expiry are separate settings. Keys last 24 hours by default; alternatives are 1 or 8 hours, or 3 or 7 days. Choose the shortest practical period. After registration, the Agent’s separate access period governs continued access.
Create the first working connection
In the local Resources tab, add the required host, API or folder. Save the policy and select Test connection. This check runs as the service account, so it represents the flow’s access more accurately than opening the same resource in your personal desktop session.
In Data Bridge, open the relevant connection settings and choose Connection method → Through Agent, then select the Agent. For files, use Local folder (through UBC Agent). Select Test, then run a controlled flow using agreed test data. The computer administrator edits the local resource list; Data Bridge displays a read-only copy.
Check the supported route
The Agent route supports the applicable HTTP and TCP connections and local folders. Examples include an internal REST API, PostgreSQL, Microsoft SQL Server and IBM Planning Analytics with a supported authentication method. Each connection still has its own credential and certificate requirements.
Do not plan ODBC or FTP/FTPS connections through the Agent. Use a dedicated database connector or an allowed folder for file exchange. IBM Planning Analytics connections using Cognos Gateway corporate sign-in or a user session use the direct route. See resources and networking for configuration details.
Manage access throughout operation
Use Disable to suspend access temporarily. Enable restores it without a new registration key. Revoke access invalidates certificates and unused keys; registration then requires a new key.
To move an Agent, install it on the new computer, configure resources and register it using Issue new key. Once the new registration completes, the previous certificates stop working. Do not copy the state directory: registration is bound to the computer. Review logs, access expiry and update history regularly. Use the troubleshooting guide when a check fails.