1. Prepare Windows
For ongoing operation, use Windows 10 or 11, or Windows Server 2016, 2019, 2022 or 2025. The installer selects the runtime for the computer’s architecture. Before deploying on legacy Windows, confirm compatibility with your administrator: those systems need additional updates and use an older runtime.
You need administrator privileges, access to local resources and outbound TCP 443 connectivity to Data Bridge. Keep the computer running with its clock synchronized. Allow approximately 60 MB for two program versions, plus log storage: up to 120 MB with the default retention settings.
Windows 7 SP1, 8, 8.1, Server 2008 R2 SP1, 2012/2012 R2 and 32-bit Windows 10 use Python 3.8. Legacy systems require KB2999226 or KB3118401; Windows 7/Server 2008 R2 also require KB2533623 or KB3063858. The installer checks these requirements. Python 3.8 no longer receives security updates, so choose a newer operating system for ongoing deployment.
2. Verify the installer
Obtain the .exe file and its expected SHA-256 checksum from your Data Bridge administrator. Check the file in PowerShell, replacing the example path below with the actual installer path:
Get-FileHash "C:\path\to\installer.exe" -Algorithm SHA256The checksum must match exactly. The initial installer does not have an Authenticode signature, so SmartScreen may display a warning. Only after verifying its origin, checksum and administrator approval should you select More info → Run anyway. Do not disable Windows protection. If verification fails, obtain a valid package again.
3. Install the service
- Run the verified installer and approve the UAC prompt.
- At Registration key, paste the single-use key into the dedicated field, or leave it empty to register after installation. Do not place the key in a command line or shared deployment log.
- Wait for system checks, file installation and service creation. If a required operating system update is missing, the installer explains the requirement and stops before making changes.
- Open Agent settings at completion and check the registration result.
The main service, UBCDataBridgeAgent, starts automatically with a delay and runs as NT SERVICE\UBCDataBridgeAgent. UBCDataBridgeAgentUpdater runs only during updates. Program files are stored in C:\Program Files\UBC Data Bridge Agent\; settings, state and logs are under C:\ProgramData\UBC Data Bridge Agent\.
The configuration file is C:\ProgramData\UBC Data Bridge Agent\config.json. Change it through Agent settings; do not manually transfer private state or secrets to other computers.
4. Register and approve the Agent
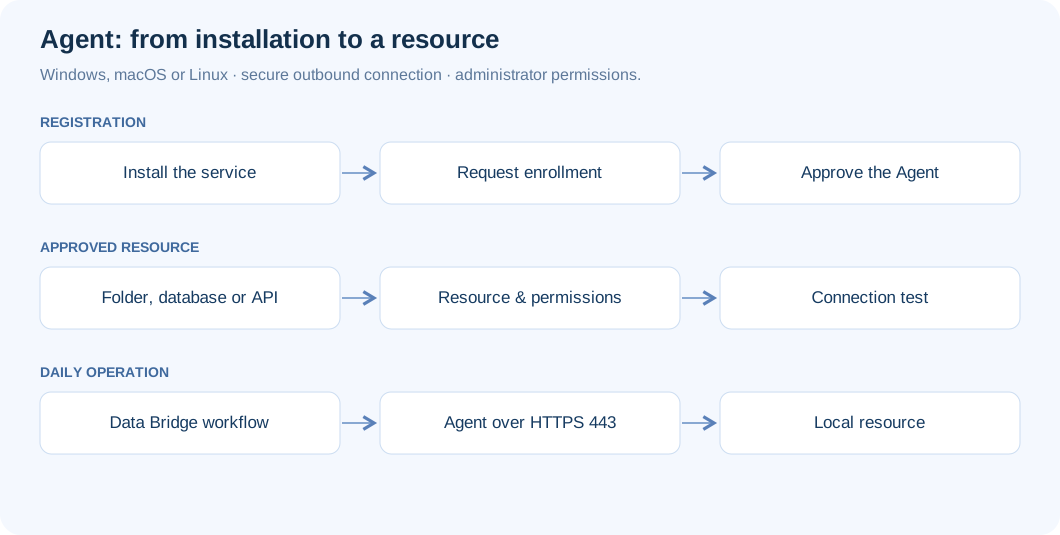
Open Start → UBC Data Bridge Agent → Agent settings with administrator privileges. If you have not entered the key, open Connection, paste it into its dedicated field and select Register. The key supplies the Data Bridge address. Use Change only for an approved HTTPS address belonging to your installation.
Compare the confirmation code with the code under Settings → Access → Agents in Data Bridge. Approve only matching codes. The local Status tab should show Connected. If a proxy is required, configure it under Connection; enter its password in the separate password field, never in the URL.
5. Allow resources and folders
In Resources, add an exact host and port, an API base URL or a folder. For a local folder, select Grant service access to assign service account permissions according to the resource policy. Both Agent permission and Windows permission are required.
Use UNC paths for network folders, such as \\server\share\Reports. On the file server, grant the computer account access to both the share and the NTFS folder. A drive such as Z: mapped in your personal session may be invisible to the service; use its full network path. In a workgroup, an administrator can configure a dedicated service account through service properties.
Select Test connection beside the resource. A folder write test requires separate confirmation. Then choose Through Agent or Local folder (through UBC Agent) in Data Bridge and select Test.
6. Check the service and logs
To inspect service status, open an administrator Command Prompt:
sc query UBCDataBridgeAgentStop and start the service during an agreed maintenance window because these actions interrupt access for active flows:
sc stop UBCDataBridgeAgent
sc start UBCDataBridgeAgent
The installation log is %TEMP%\UBC-Data-Bridge-Agent-install.log. Runtime logs are C:\ProgramData\UBC Data Bridge Agent\logs\agent.log and audit.log. For network checks, use Diagnostics → Run diagnostics, which tests the route in the service account’s context.
7. Update and uninstall deliberately
Under Version and updates, select automatic, manual or disabled updates. Automatic updates verify the publisher’s Ed25519 signature and SHA-256, install the version alongside the current one and restore the previous version if the new one cannot start or connect. In manual mode, select Update now. Running the installer again preserves settings and logs.
To uninstall, open Settings → Apps → UBC Data Bridge Agent → Uninstall. Removing settings, the Agent key and logs requires a separate confirmation. Revoke access in Data Bridge as well. Move to a different computer through a new registration, not by copying the state directory. Continue with resources and networking or troubleshooting.